Disassembly of Heating Element in Fuser Assembly:
A.Because the cost of replacing the whole fuser assembly is very high, restoring damaged fuser assembly is one indispensable part in“repairing service of printer”. Meanwhile, it is the most common and cost-cutting solution to replace heating element, fuser film sleeve.
B.Required tools:
1)Crosshead Screwdriver
2)Screwdriver
3)Heat Gun
4)Knife
5)Fuser Assembly

C.Steps of disassembling heating element
1)First, take down the screw, metal cover, spring and other parts on fuser assembly, then take out fuser roller and fuser film sleeve.
2)The following is the key steps of disassembling heating element:
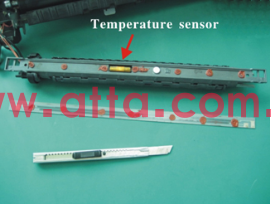
a.Put the temperature of heat gun setting as 260-280℃, and preheat on heating element to Soften the silicone.
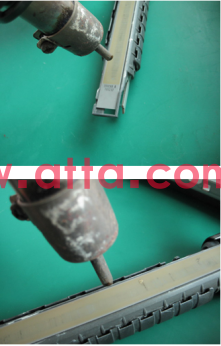
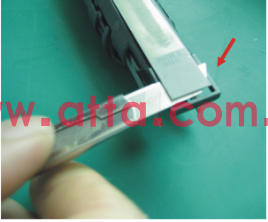
b.Meanwhile lever the side of heating element softly, and then put the knife slowly into inside heating element. When doing this step,please notice the knife must be parallel to heating element, otherwise the heating element will damage and break.
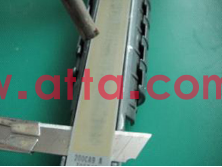
c.Put the heat gun about 40mm before the knife.
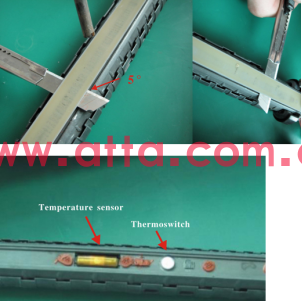
d.After heating about 10 seconds,move heat gun and knife forward slowly .When moving knife,please note to keep it upward 5°angle to close to inside heating element, not to damage temperature sensor or temperature switch. If the knife meets obstacles, you need to adjust the angle of the knife properly or get back lightly then move forward again.
e.Here ,we have completed the process of disassembling heating element. Then the next is to clean pedestal of fixing film unit- old silicone and other sundries.
At this moment, we need to check whether heating element holder is burned, distorted, damaged etc.If so, please replace it timely.
If you need more relevant information, please contact us any time, we are pleased to serve you.
+86-27-87876887